
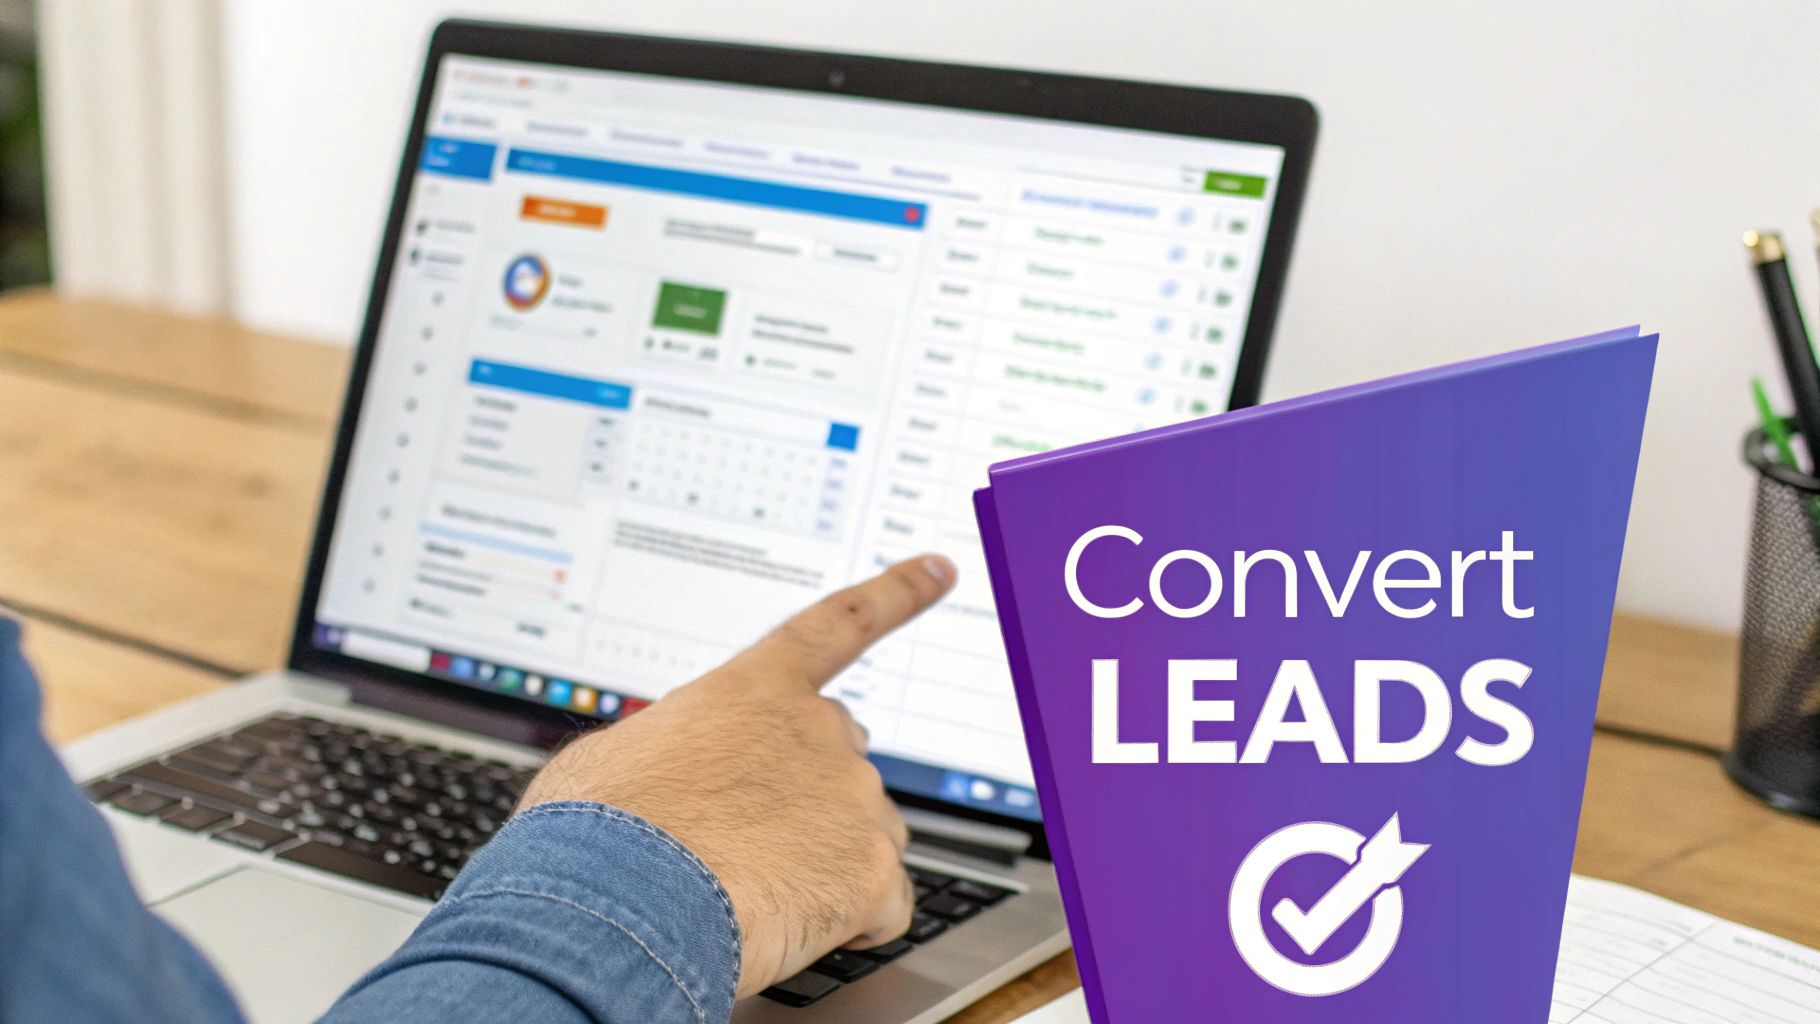
In Salesforce, "converting a lead" means turning that initial spark of interest—a qualified Lead record—into a structured business relationship. This one click creates an Account, a Contact, and, if the timing is right, an Opportunity.
This isn't just a bit of data housekeeping. It's the official handoff from marketing to sales, marking the moment a prospect becomes a real sales-qualified lead ready for your team's attention.
Why Lead Conversion Is More Than a Button Click
That 'Convert' button in Salesforce looks simple, but the strategy behind when and how you click it is what separates high-performing teams from the rest. It’s about building a clean, reliable foundation for your entire customer relationship from day one.
Getting this right is crucial for accurate sales forecasting and truly understanding the customer journey. A proper conversion preserves all that valuable history—every email opened, every link clicked—giving your sales team the full picture they need to have smarter conversations.
The Anatomy of a Converted Salesforce Lead
When you convert a lead, Salesforce creates up to three distinct records. Here’s a breakdown of what each one is and why it matters for your sales process.
- Account: This is the company or organization. It acts as the central hub for all related contacts and deals. It typically stores the company name, address, industry, annual revenue, and phone number.
- Contact: This is the individual person you're communicating with at that account. This record stores the person's name, email, title, phone number, and communication history.
- Opportunity: This is the potential sale. It’s where you track the deal's progress, value, and expected close date. The Opportunity holds the deal name, amount, stage in the sales cycle, and key decision-makers.
By splitting the lead into these dedicated records, Salesforce keeps your data organized and helps your team manage complex relationships with multiple stakeholders and deals at a single company.
The Foundation of a Healthy Sales Funnel
Think of lead conversion as the moment a conversation gets serious. It's the point where you’ve decided a prospect is worth your sales team's most valuable asset: their time.
For teams capturing leads at events with tools like SpeakerStacks, this is a pivotal moment. A quick scan of a QR code on a presentation slide instantly creates a lead, and converting it is the next step in turning that initial engagement into a real sales process.
A strategic approach to conversion pays off in several ways:
- Data Integrity: It prevents duplicate records, keeping your CRM clean and trustworthy.
- Accurate Reporting: You can finally track which marketing sources and events generate the most valuable opportunities.
- Sales Efficiency: Reps get a complete history, so they aren't asking questions the lead has already answered.
A well-managed lead conversion process is the engine of a predictable revenue machine. It ensures that every qualified lead is accounted for, tracked, and moved through the pipeline with purpose, preventing valuable prospects from falling through the cracks.
Maximizing Your Conversion Impact
To get the most value from each lead, you need solid conversion rate optimization strategies. This goes beyond just the technical steps in Salesforce and gets into understanding the entire customer journey.
For instance, companies that implement advanced lead scoring models often see a huge financial impact. One study found that teams using these models can achieve a 70% increase in ROI from their lead conversion efforts alone. You can learn more about optimizing lead conversion and building a stronger pipeline directly from Salesforce.
Setting Up Your System for Seamless Conversions
A great lead conversion process doesn't just happen when someone clicks the 'Convert' button. It's the result of groundwork and thoughtful configuration that lines up perfectly with how your team actually sells. Getting your Salesforce environment ready from the start is the single most important thing you can do for a smooth handoff from marketing to sales.
When you get this right, all that valuable context you gathered while nurturing the lead flows effortlessly into the new Account, Contact, and Opportunity records. No more lost details, no more confused reps.
Define Your Handoff with Custom Lead Statuses
Think of the Lead Status field as more than a simple dropdown. It’s the traffic signal for your entire sales funnel. The default options like 'Open' or 'Working' are okay, but they don't give your team the clarity they really need.
You should customize these values to match the actual steps in your process. For example, if you capture a lead using SpeakerStacks at a conference, its journey might look something like this:
- New (Event Capture): Freshly scanned at an event.
- Nurturing (Marketing): Marketing is sending follow-up materials.
- Sales Accepted Lead (SAL): A sales rep has reviewed and claimed it.
- Qualified to Convert: This is the green light. The lead is vetted and ready for an active sales cycle.
This kind of clear progression removes all the guesswork. A rep seeing "Qualified to Convert" knows exactly what it means and that it's time to act.
Properly configured Lead Status values act as a contract between marketing and sales. They establish a clear, universally understood trigger point for when a lead is officially ready for the sales team to take over, which dramatically reduces friction and missed opportunities.
Map Your Fields to Preserve Critical Data
Field mapping is where the magic really happens—or where it falls apart. This is the process that tells Salesforce where to put the information from the Lead record when it creates the new Account, Contact, and Opportunity. If you don't map a field, that data is gone for good once you convert the lead.
Think about all the unique data points you're collecting. If you're using SpeakerStacks, you likely have custom fields like "Event Name" or "Presentation Topic." You absolutely have to make sure that context lands on the new Opportunity or Account so your sales team knows the story behind the lead.
Here's how to check your setup:
- Navigate to Setup: Head to 'Object Manager' and select the 'Lead' object.
- Find Field Mapping: Click on 'Fields & Relationships,' then hit the 'Map Lead Fields' button.
- Match Your Fields: Go through and carefully match your custom lead fields to the right fields on the Account, Contact, and Opportunity. A classic mistake is forgetting to map a lead's 'Lead Source' to the corresponding 'Account Source' field—a small oversight that completely wrecks your ROI reporting down the line.
For a deeper look into building a solid lead management foundation, it's worth exploring CRM integration best practices and pipeline management. The way your systems talk to each other is crucial for a healthy sales process.
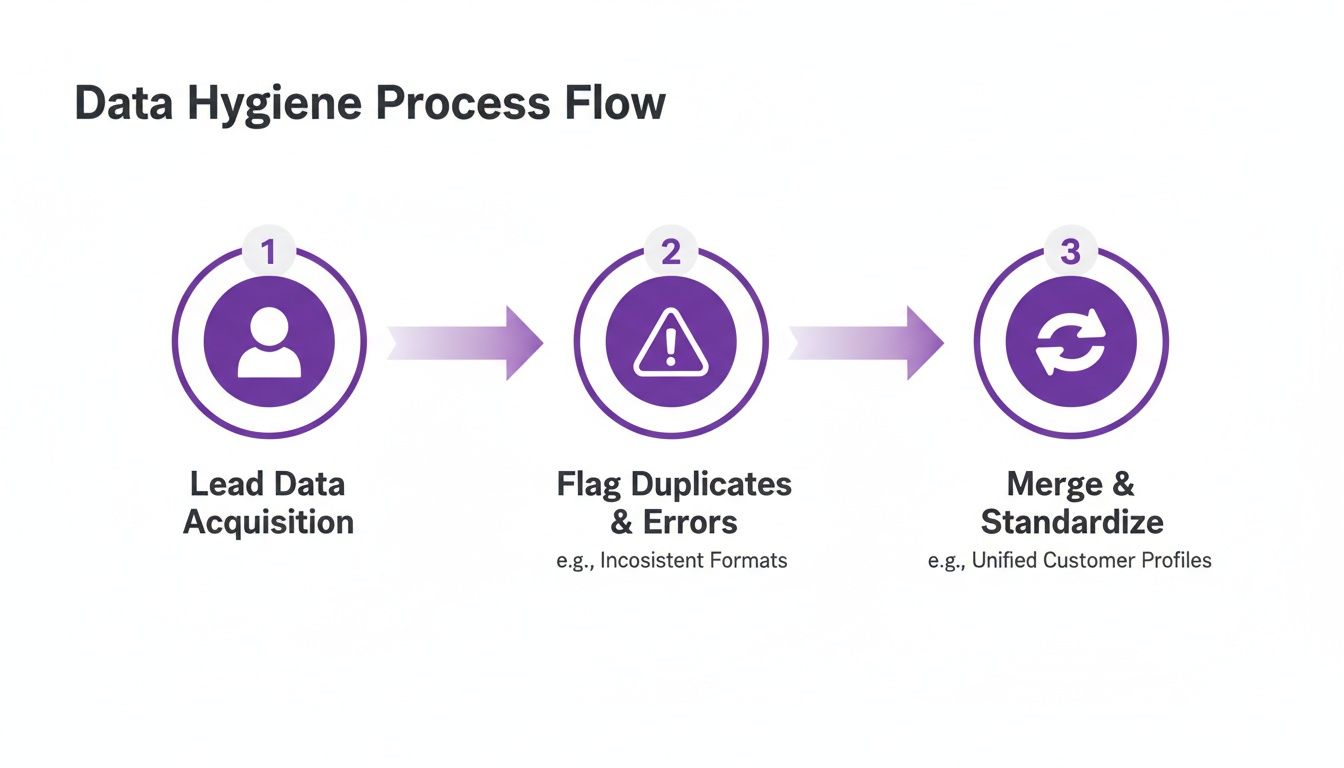
Keeping Your Data Clean and Ditching the Duplicates
Nothing grinds a sales process to a halt faster than a messy CRM. Seriously. When your Salesforce instance is clogged with duplicate records, your reps are left scrambling, trying to figure out which record is the "right" one. Your reports become a house of cards, and the customer experience takes a nosedive.
Keeping your data clean isn't just a chore for the admin team; it's fundamental to converting leads effectively. A pristine database means every touchpoint, every conversation, is logged against one single source of truth. This is how you get that elusive 360-degree view of your customer.
Put Salesforce’s Native Duplicate Rules to Work
The good news is that Salesforce gives you some powerful, built-in tools to fight the duplication battle right at the source. We're talking about Duplicate Rules and Matching Rules. These two features work in tandem to intelligently flag when a new lead might already be in your system as a Contact, or even part of an existing Account.
Instead of letting your team blindly convert every single lead that comes in, you can set these rules up to give them a heads-up during the conversion process.
Matching Rules: This is how Salesforce identifies a potential duplicate. You can get pretty specific here, setting rules to look for matches based on an email address, a combination of first and last name, or even custom fields you've created.
Duplicate Rules: This is what happens when Salesforce finds a match. You can configure it to simply alert the user, or you can go a step further and block them from creating a new record altogether.
A really simple but effective matching rule, for instance, is one that flags any new lead if their email address is an exact match to an existing Contact's email. This one check can save you countless headaches by preventing a redundant record and prompting your rep to add the new info to the existing contact instead.
The biggest mistake I see is teams treating every new lead like a brand-new person. When a contact from a key account shows up at another one of your speaking events, the goal isn't to create a new record—it's to deepen the relationship you already have by enriching their existing one.
The Art of Merging vs. Creating
This brings us to a critical decision point for any sales team: when do you merge a lead into an existing record, and when do you create something new? This is a daily reality for teams using a tool like SpeakerStacks, where you’re constantly capturing engagement from the same people at different events.
Let's walk through a real-world example. Say Jane Doe from ABC Corp downloads your slides at a conference in March. Your team does their job and converts her into a Contact under the ABC Corp Account. Perfect. But then, six months later, she attends one of your webinars and scans a QR code.
Your duplicate rules should immediately flag this new lead as a potential match for the Jane Doe Contact already in your system.
The right move here is to merge the lead. Merging appends the new activity (the webinar attendance) to her existing Contact record, keeping the entire history of her engagement in one place. If you were to create a new Contact, you'd fracture that history, making it impossible for anyone to see her full customer journey.
For a deeper dive into how this fits into the bigger picture, take a look at our guide on what to look for in a lead generation CRM.
Automating Lead Conversion with Salesforce Flow
In any fast-moving sales org, manually converting every lead is a huge time-sink. It’s a bottleneck that slows down your sales cycle, opens the door to human error, and leaves valuable, high-intent prospects sitting in a queue. This is precisely where automation steps in, and in the Salesforce world, Flow is your best friend.
Think about it: a lead hits a critical milestone—say, its status flips to "Sales Qualified"—and instantly, Salesforce creates the Account, Contact, and Opportunity. No one has to click a thing. This creates a completely seamless handoff from marketing or SDRs to your account executives, allowing for immediate action when the lead is hottest.
Defining Your Automation Trigger
The heart of any good automation is its trigger. It's the specific event that tells Salesforce, "Hey, it's time to do this thing." For lead conversion, your trigger needs to be directly linked to the exact moment a lead is ready for the sales team to take over.
One of the most common and effective triggers is a change in the Lead Status field. It’s simple and clear. For instance, you can set up your flow to run only when:
- A Lead record is updated.
- The Status field is changed to 'Qualified to Convert'.
This specific condition ensures your automation fires at the right time, every time. It prevents accidental or premature conversions and builds a reliable, predictable engine for moving leads down the funnel.
Automation isn't about replacing your sales team. It's about letting them focus on what they do best: building relationships and closing deals. When a flow handles the tedious admin work of conversion, your reps can jump straight into engaging with a perfectly teed-up new Opportunity.
Building Your Conversion Logic in Flow
Once you’ve nailed down the trigger, the real work happens with the 'Convert Lead' action inside Flow Builder. The good news is that this is a standard, out-of-the-box action, so you don't have to build a bunch of complicated logic to create three separate records. Salesforce has already done the heavy lifting.
When you drag this action onto your flow canvas, you just need to tell it which lead to convert. Since we’re building a record-triggered flow, you simply point it to the ID of the lead that kicked off the process in the first place.
This diagram shows the basic idea of identifying a lead, flagging it for action, and ensuring data stays clean through the process.
This is a core concept for automation. A well-built flow can systematically check for duplicates before converting, which is the key to maintaining a clean and trustworthy CRM.
Handling Outputs and Next Steps
The 'Convert Lead' action does more than just convert the record; it also gives you the IDs of the brand-new Account, Contact, and Opportunity as outputs. This is where you can get really smart with your automation by adding follow-up steps.
For example, once the conversion is complete, you can use those new record IDs to:
- Update the Opportunity: Immediately set the Opportunity Stage to "Qualification" and maybe assign a default close date 30 days out.
- Assign Ownership: Make sure the new records are owned by the right person—usually the same rep who owned the original lead.
- Create a Follow-Up Task: Automatically generate a task for the new Opportunity owner, like "Make initial contact call within 24 hours."
This kind of end-to-end process is especially critical when you're dealing with a high volume of inbound leads, like those you might capture from a speaking event using SpeakerStacks. It guarantees every qualified prospect is not only converted instantly but also has a clear next action assigned, ensuring no lead ever falls through the cracks.
Handling Event-Sourced Leads from SpeakerStacks
Leads from live events are pure gold. When someone scans a QR code during your talk, they're not just another name in a spreadsheet—they're actively engaged and showing serious interest right in that moment. That's why leads from a platform like SpeakerStacks demand a smart approach once they land in Salesforce.
The key to converting these leads is to hang onto all that valuable context. It’s not enough to know their name and company. You need to know which event they attended, what presentation grabbed their attention, and the exact call-to-action that made them scan. This is where a little bit of setup with custom field mapping pays off big time.
Preserving Critical Event Context
Before you even think about sending event leads to Salesforce, make sure you have the right custom fields waiting for them on both the Lead and Opportunity objects. If you don't, all that crucial event data will vanish the second you hit "Convert."
I recommend creating a few specific fields:
- Event Name: Tracks the exact conference, webinar, or talk that brought in the lead.
- Presentation Topic: Gives your sales team immediate context for their first outreach.
- CTA Resource: Lets you know if they downloaded slides, asked for a demo, or signed up for a newsletter.
When you map this info from the lead record over to the opportunity, you're handing your sales reps a massive advantage. They can skip the generic, "I see you went to our event," and jump right to, "I noticed you downloaded the slides after my talk on AI in sales—what part did you find most interesting?" That’s a game-changer.
The real value of an event lead isn't just their contact information; it's the story behind their engagement. Failing to capture and transfer that story into Salesforce is like throwing away the most valuable part of the lead.
This is a great example of a SpeakerStacks page built for capturing leads smoothly at an event.
Notice how it gives attendees multiple, clear calls-to-action. This lets them self-segment based on their interests, which sends even richer data straight into your CRM.
Pinpointing ROI with Precision
Beyond just giving your sales team better talking points, this data is how you finally prove the ROI of your speaking gigs. By consistently using the Lead Source field (think "Conference - SaaS Growth Con 2024"), you can build Salesforce reports that show exactly which events are filling your pipeline and driving revenue.
If you're serious about your event strategy, you need to understand the tools you're using. Taking some time to review different types of event lead capture systems will help ensure the data you're collecting is clean and ready to go.
When you connect specific event activities to actual sales, you turn public speaking from a "brand awareness" play into a predictable revenue machine.
Measuring Your Lead Conversion Performance
You can't fix what you can't see. After all the work of setting up your data flows and automation, the real moment of truth comes from building the Salesforce reports and dashboards that show if your strategy is actually working. Without solid metrics, you're just flying blind.
Good measurement turns a pile of raw data into a clear story about the health of your sales funnel. By tracking the right key performance indicators (KPIs), you can spot bottlenecks, figure out where your best leads are coming from, and make smart decisions that directly grow revenue. This isn't just about staring at numbers; it's about understanding the why behind them.
Essential Reports to Build Today
To get a real grip on your lead conversion effectiveness, you need to go beyond the out-of-the-box reports. Let's start by creating a few custom reports that answer the big questions. These will become the backbone of a truly useful lead management dashboard.
Here are three reports I believe every single team needs:
Lead Conversion Rate by Source: Think of this as your ROI compass. It shows you which channels—like events you run with SpeakerStacks, organic search, or paid campaigns—are actually delivering leads that turn into real opportunities. A high volume of leads from one source is just noise if none of them ever convert.
Average Time to Conversion: This is a direct measure of your sales velocity. How long does it actually take for a new lead to become a qualified contact with an opportunity? Tracking this helps you find hidden delays in your process and see if your automation is actually making things faster.
Opportunity Creation Rate: Let's be honest, not every conversion is created equal. This report shows you what percentage of your converted leads result in an open Opportunity. If this rate is low, it’s a red flag. It could mean your team is converting leads too early, or your definition of a "qualified lead" needs a serious tune-up.
Your Salesforce dashboard shouldn't be a random collection of charts. It should be your command center, giving you a quick, at-a-glance view of your entire lead-to-revenue journey. It should make it dead simple to see what’s working and what’s not.
From Data to Actionable Insights
Once you have these reports built, don't just let them sit there. Use Salesforce’s charting tools to make the data pop. A simple pie chart breaking down lead sources by their conversion rate can instantly show you where to double down on your marketing budget. A bar chart tracking your average conversion time month-over-month will prove whether your process changes are paying off.
The end game here is to connect your efforts directly to business outcomes. When you can walk into a meeting and show that a 10% improvement in your conversion rate led to a 15% jump in the sales pipeline, you're demonstrating the real-world value of a well-oiled sales process. That’s how you turn your CRM from a glorified address book into a strategic growth engine.
Common Questions & Quick Answers
Let's tackle some of the common "what ifs" that pop up when you're converting leads in Salesforce. Getting these details straight can save you a lot of headaches down the road.
What Actually Happens to the Original Lead Record?
Think of it this way: once a lead is converted, Salesforce essentially archives it. The original lead record is flagged as "converted," making it read-only and hiding it from standard searches and reports.
This is a good thing—it keeps your active pipeline clean and prevents anyone from accidentally working a lead that's already become a contact. It also underscores why your initial field mapping is so critical. The data moves to its new home on the Account, Contact, and Opportunity records, and that original lead record is effectively locked.
Can I Undo a Lead Conversion?
The short answer is no, not easily. Salesforce doesn't have an "undo" button for lead conversion.
Once that conversion happens, the new Account, Contact, and (optional) Opportunity records are created, and that's a permanent action in the system. While a savvy admin could try to manually delete the new records and recreate the lead, it's a messy, high-risk process. You're almost guaranteed to lose some data or context along the way.
Expert Tip: Your best defense is a good offense. Establish a rock-solid lead qualification process. Make sure your team only converts leads when they are genuinely sales-ready.
How Should I Handle Leads Without a Company Name?
This is a common scenario, especially for B2C businesses or those who work with freelancers and independent consultants. Salesforce has a built-in solution for this.
When you convert a lead that's missing a company name, Salesforce creates an Account record using the person’s full name as the Account Name. This ensures you still have that central Account hub to link the Contact and any future deals to, maintaining a clean data structure even without a formal company.
Ready to turn your speaking engagements into a predictable revenue stream? SpeakerStacks gives you the tools to capture high-intent leads in real-time and seamlessly feed them into your Salesforce workflow. Stop letting audience attention disappear after your talk.
Ready to capture leads from your next talk?
SpeakerStacks helps you display QR codes, capture attendee information, and sync leads directly to your CRM. Get started free.


Want More Insights?
Subscribe to get proven lead generation strategies delivered to your inbox.
Subscribe to Newsletter